9 Shadow/Highlight
This
is an amazingly useful and surprisingly easy tool that will save
images where the subject is too dark.
If
the details in an image are too dark, you'll want to make it
brighter. However, if you just raise the brightness of an image, any
details even close to white will get 'blown out' and become
featureless white. Clouds are a good example of a detail that might
suffer from being brightened.
The
example I've got for you is a picture of Rhyl Beach on the morning
that the tail end of Hurricane Gonzalo was due to arrive.
The
sky is fine but the beach is almost black. This beach is known for
golden sand.
First,
I'll use the brightness control to try and lighten the sand, just so
you can see the problems it causes.
With
the brightness increased by a ridiculous amount, the beach looks more
like wet sand should but the clouds have featureless bright patches.
Now
using Shadow/Highlight instead, adding 50% to the shadow slider over
a tonal width of 50% (that's the darkest 50% of the pixels). The sand
is lighter but the sky and sea are pretty much unchanged.
Obviously,
I've deliberately overdone the brightness example but I had to
increase the brightness by 70% and the contrast by 20% to get the
sand to match the Shadow/highlight image.
I
haven't finished with that image yet. I'll revisit it in a later
chapter. Meanwhile, here's another example:
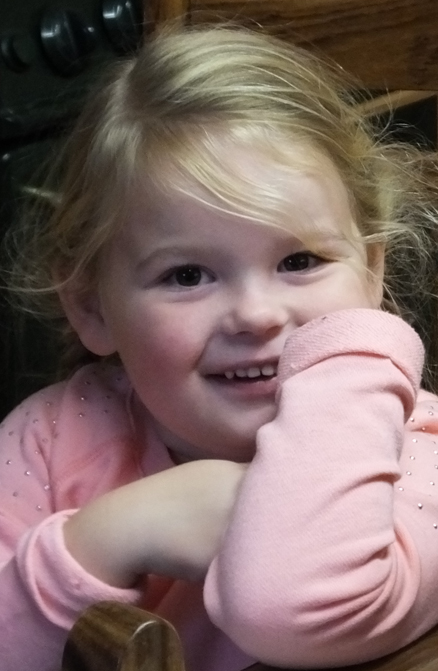
Taken
in fluorescent light, the background is dark, the eyes are dark and
the colours are washed out. But my model, Nel, has deigned to smile
nicely so let's see what we can do.
33%
Shadow/Highlight over 66% tonal range (2/3rds of the pixels) makes a
major difference. The colours are still wishy-washy but I'll sort
that out in the next chapter.
At
least you can see her eyes are brown and the stove is green.
There
is no set rule for these adjustments but the Shadow/Highlight tool
pops up a window with a set of sliders in it. The image changes
instantly as you move them so I urge you to just have a play with the
sliders and see how each one effects the image. Remember, you can
always step backward and undo it.
If
you have to shoot towards light, you often get subjects in
silhouette. That's fine for the wings as it gives them some detail,
but I'd like to see what colour that insect is.
Shadow/Highlight
to the rescue! This is the result of about 60% increase on the Shadow
slider and 60% tonal range.
The
greenery is too light now and the body of the dragonfly has a purple
hue I happen to know it shouldn't have (because I know it's meant to
be blue). I'll revisit this image in the next chapter to correct the
colour.
My
examples have all involved shadow adjustments. The Shadow/Highlight
tool has a second set of sliders to adjust highlights but I rarely
find I need to use them. Don't let that stop you from having a play
with them though.


